Learning how to change whole house water filter is a project most homeowners don’t think of until it becomes necessary.
The problem is that outdated and old whole house water filters will give you low-quality water with potential contaminants.
Fortunately for you, dealing with a whole house water filter is much simpler when you have a step-by-step guide to help!
- How To Change Whole House Water Filter
- Before You Get Started
- Step 1: Depressurizing and Turning Off the Water
- Step 2: Working on the Bypass Valve
- Step 3: Accessing the Filter Canister
- Step 4: Clean Out the Housing
- Step 5: Replace the O-Ring
- Step 6: Adding Plumber’s Tape
- Step 7: Add the Replacement Filter
- Step 8: Hand Tighten the Filter Canister
- Step 9: Repressurize Your Whole House Water Filter System
- Step 10: Fix Any Leaks
- Step 11: Clean Up
- Anyone Can Change a Whole House Water Filter With a Guide!
How To Change Whole House Water Filter
Below are the easy-to-follow steps to guide you through managing your old and new filter cartridges.
Before you know it, your house water filters will be working in tip-top shape again, offering many benefits.
Before You Get Started
You need to do a few essential things with your water supply before you begin changing whole house water filters.
Let’s quickly review the checklist before you get your hands dirty.
Get the Right Filter
Every whole house water filter uses a specific filter type. Inspect your filter and look for a model number you can search online.
Fortunately, the majority of filters are a standard size, but it’s a good idea to confirm which one your home needs.
Some homes will use a house water filter that is 10 by 4.5 inches, while others may require larger 20 by 4.5 filters.
Once you’ve confirmed which whole house filter you need, go ahead and order the part online.
It would also be wise to ensure that you already have a filter ready before doing anything else.
Find the Water Shutoff Valve
Do you know where the water supply to your home is, along with the water shutoff valve?
While you’ll use the bypass valve when changing the water filter, taking note of where these two components are is helpful if your inlet and outlet valves aren’t working properly.
Knowing the locations of your main line and shutoff valve is also critical in case of emergencies, ensuring your house doesn’t flood or leak.
Most shutoff valves will require a wrench or a special key to turn it from on to off.
If you are having difficulties, you can always contact your water utility to help.
Condos and apartments may require the help of the apartment management to turn the water off to your unit.
Get the Right Tools
This is the most crucial part of the process, aside from getting the right whole house water filter.
There are several tools and added items you will need to complete a successful filter replacement, including:
- Strap Wrench
Strap wrenches are often preferred over filter wrenches because they are of higher quality and less likely to break.
You will need this tool to help open your filter housing so that you can replace the water filter.
- O-Ring
After replacing your whole house sediment filter, the last thing you want is leaks from an old O-ring.
So, get a replacement for your blue filter, which can be slightly costly. You can often find a matching ring with your newly purchased filter.
- Silicone Grease (Food-Grade)
When loosening and tightening the filter housing, you will need to get your hands on food-grade silicone grease.
You can use it to lubricate the threads. However, the most important thing to ensure is it’s food-grade, as it could come in contact with your water.
- Plumber’s Tape
No plumbing project could ever be completed without a roll of high-quality plumber’s tape.
Also known as PTFE Thread Seal Tape, this adhesive helps ensure a good seal around the threads of your filter canister.
It is a foolproof way to avoid common leaks that could happen when replacing a whole house filter.
- Bucket and Rags
The last two items to get are a large bucket (for spills) and rags you can use to clean up once finished.
Low lint rags are your best bet, as you will put them inside the filter housing.
Turn Off All Water Appliances
Now, before diving into the filter change process, ensure your water-using appliances are off.
These may include your ice cube maker, refrigerator water dispenser, dishwasher, clothes washer, and others.
It can also be a good idea for everyone to use the washroom beforehand.

Step 1: Depressurizing and Turning Off the Water
For the first step to changing your whole house water filter, you must shut the water off and depressurize the entire system.
Taking a second bucket and filling it with water can be helpful, so you have extra fluid to wash up with if needed.
After locating your water shutoff valve and turning everything off, open the sink and bathtub faucets to let any remaining water pressure out.
Not doing this step could result in too much pressure in your line that will come out when you turn the water back on.
Don’t leave your faucets on. Instead, keep them turned off most of the time. Only turn them back on when necessary to flush the air from the lines.
Step 2: Working on the Bypass Valve
It’s time to return to your water filter system in the basement.
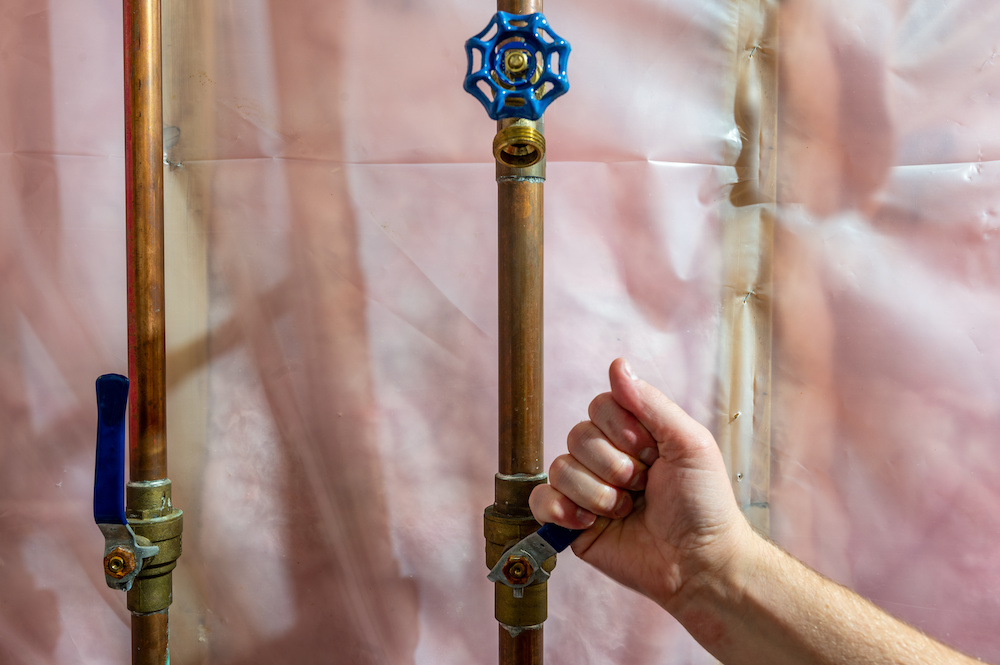
You will want to look at the valves, of which there are likely three, including:
- First handle
The first handle on your filter system is the water intake (water IN) valve. You’ll want to turn this off, as it stops water from entering the filter.
- Second handle
The second handle is a water outtake (water OUT) valve, which should also be off. This valve prevents water from backflowing into your line in the off position.
- Third handle
The third handle, likely on top of the other two, is the bypass valve. It should already be off, forcing water from the IN line through the filter to the OUT line.
You will want to turn this valve on, allowing unfiltered water to enter your house but avoiding the filter altogether.
Step 3: Accessing the Filter Canister
This step is where the strap wrench comes into play and will require a little bit of elbow grease.
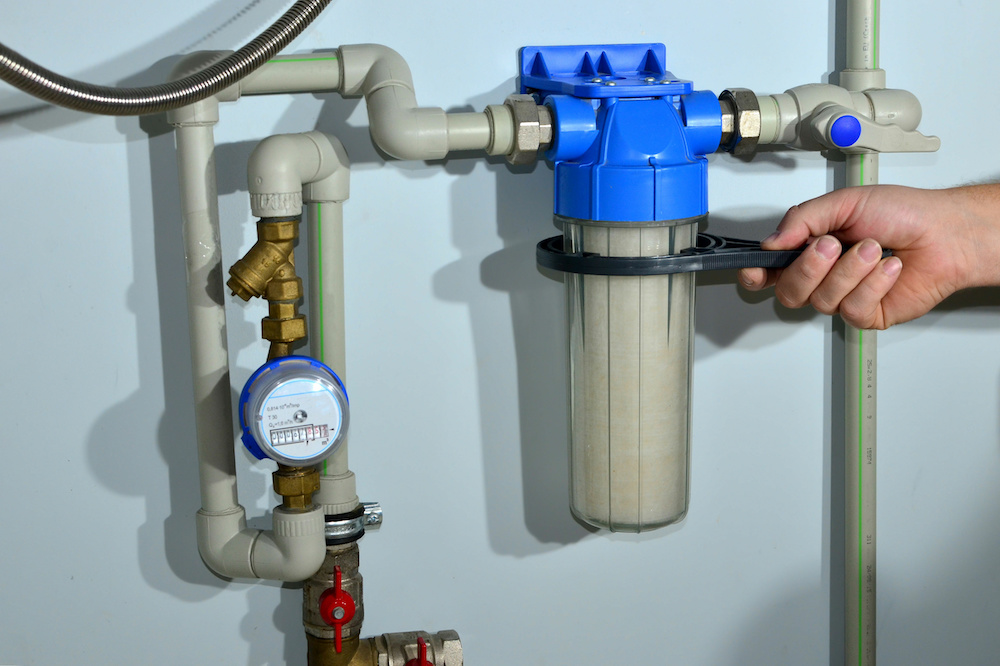
When working on your water filter housing, you must remove the filter canister from the unit.
It can be challenging, especially if the system is pressurized or if the canister is over-tightened.
Modern whole house water filters will have a pressure release button on the casing that you can push to release excess pressure.
It can help make it considerably easier to remove the filter canister.
Once the pressure is released, place your big bucket under the filtration system.
You can then begin twisting the canister with the strap wrench in a counter-clockwise motion.
Be sure to turn slowly, as you will see a lot of water.
Step 4: Clean Out the Housing
With the filter canister removed, you can now begin cleaning the old filter housing for your whole house water filter.
Get rid of big sediment pieces and remove the old disposable filter.
Check the interior components, like the center filter ring, to ensure everything is in working condition.
You will likely notice a small amount of sand and other traces of debris.
If there are large chunks of rust, concrete, or pebbles, there could be an issue with your water lines requiring professional help.
Taking your clean, lint-free rag, clean the inside and outside of the filter canister.
Step 5: Replace the O-Ring
Carefully remove the old O-ring from the canister, cleaning the track with a Q-tip to remove the old food-grade silicone grease.
After cleaning everything, reapply clean silicone grease to the track and reinstall your new O-ring, ensuring it is perfectly fit.
Step 6: Adding Plumber’s Tape
Take your plumber’s tape and wrap it around the threads of the filter canister, ensuring you get good coverage.
This step is essential for protecting your whole house system from leaks. It also ensures the filter is completely shut, maximizing your water pressure.
Step 7: Add the Replacement Filter
Now comes the time to add your new filter to your whole house water system.
A top tip is to pre-soak the filter in a bowl of clean water, especially for charcoal filters.
When placing the filter in the housing, ensure it is perfectly centered, or you could damage it when screwing it back on.
Step 8: Hand Tighten the Filter Canister
After replacing the old water filter cartridge with the new one, it’s time to put your water system back together.
Slowly and carefully hand-tighten the filter canister, as you won’t need your wrench with the added plumber’s tape.
Pay close attention to ensure you tighten it straight, not damaging the top of the new filter.
Step 9: Repressurize Your Whole House Water Filter System
Do this step as slowly as possible to prevent sudden pressure change issues.
You will want to turn off the bypass valve and slowly pressurize the system, opening the water valve 1/4 of the way.
If all is good, open the water valve and the water out valve the remainder of the way. It should make some gurgling noises as your water system flushes itself.
Letting the water run through your faucets for a few minutes can be a good idea, getting any gunk out of your water line.
Step 10: Fix Any Leaks
You will likely catch leaks if it is your first time changing your whole house water filter.
If that happens, shut the system down again, adjust your plumber’s tape and O-ring, and tighten the seal on your filter.
Once complete, turn the water on slowly again.
Step 11: Clean Up
By now, you have mastered changing your whole house water filter.
All that’s left is to clean up any standing water and markings on your filter canister when the filter change was made.
This can help you stay on top of your filter replacements as needed.
Anyone Can Change a Whole House Water Filter With a Guide!
Learning how to change whole house water filter can be daunting, especially as someone with little plumbing experience.
Fortunately, the job is relatively user-friendly and requires very few tools. Even if you spring a small leak, it’s easily fixed with a couple of additional steps.

